A $169 DIY AC controller that saves 450 kWh a month
The parts were fine. The plan wasn't: one small board doesn't have enough pins to run a screen, a network chip, a CO2 sensor, and two infrared emitters at once, and the AC itself spoke a protocol none of the ready-made decoders recognized. Here is the whole DIY smart AC controller build, all $169.70 of it.
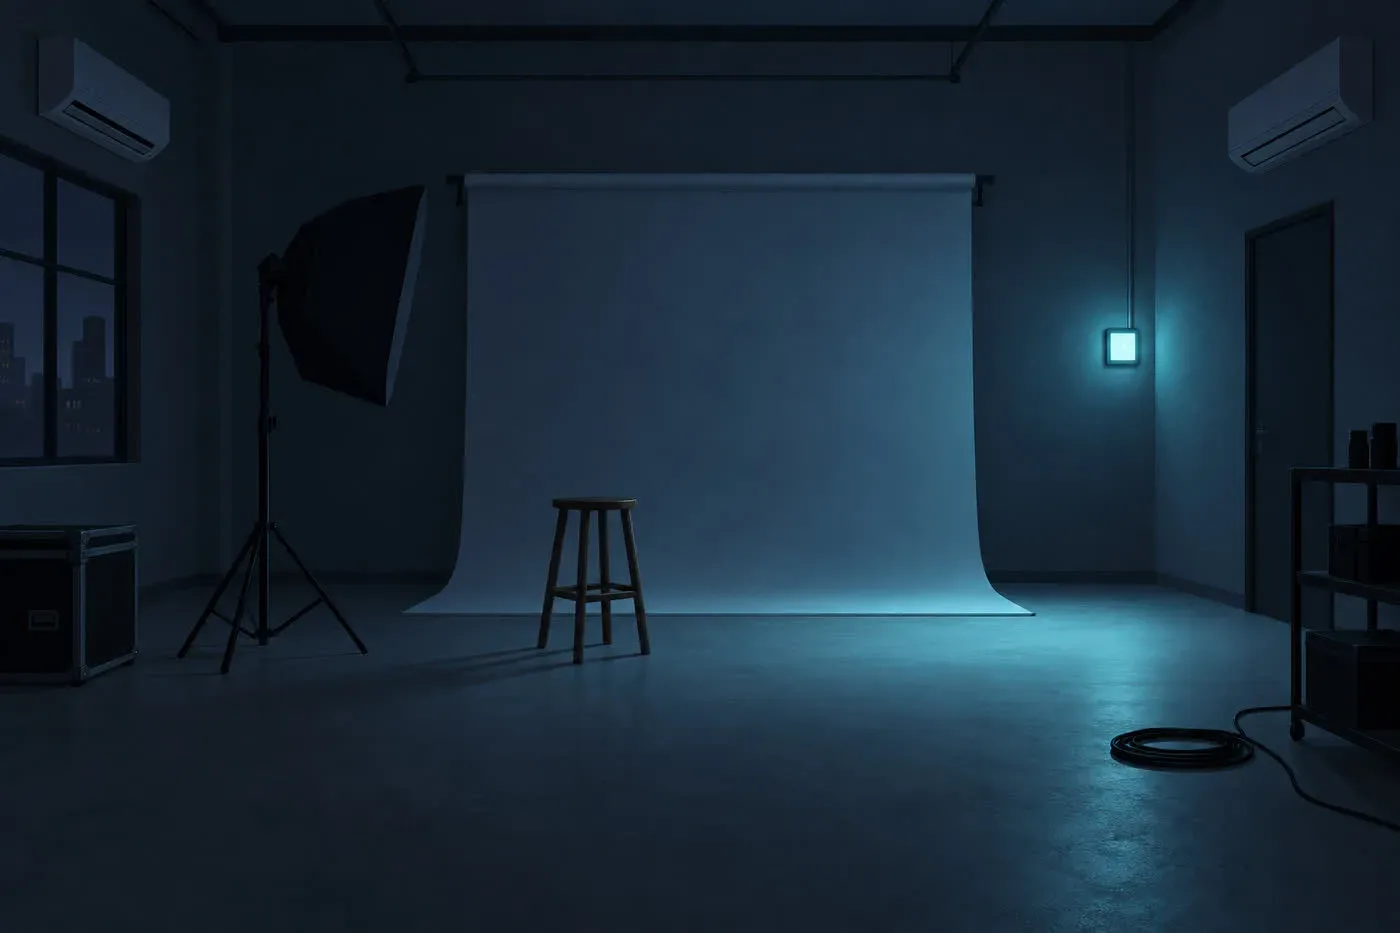
A friend of mine runs a small photo studio, rented out by the hour. There is no staff. Photographers book a slot, punch a door code, and let themselves in with their clients and their gear.
That last part is the whole problem. You cannot ask a paying client to stand around in a hot room while a wall-mounted air conditioner catches up. And a room full of people under shoot conditions goes stale long before it gets hot, which is why this story involves a CO2 sensor.
Before this project, the climate was run by whoever was there last. They set the air conditioners with a remote and left. So the units routinely ran all night for an empty room, and just as often the next booking walked into the wrong temperature anyway.
My friend is not there most days. I am almost never there. But I am the person in our friend group with a soldering-adjacent reputation, so I got volunteered.
I had never actually soldered anything. That becomes relevant.
the plan that was supposed to cost $60
The studio runs on a small budget. That is why its two air conditioners are cheap white-label Chinese splits rather than a known brand, and it is why the proper routes, a commercial climate-automation install or one of the smart-AC-controller gadgets, were never seriously on the table. They cost several times more than what I ended up spending, and what I ended up spending was already too much.
On July 17 I asked Claude to pick the parts. The requirements: a small ESP32 controller board, Ethernet with power over the cable, a sensor for CO2, temperature, and humidity, and infrared control for the two ACs. Infrared control means teaching a circuit board to click the remote electronically. The AC cannot tell the difference between a remote in a human hand and a small LED blinking the same pattern at it.
The first estimate came back at about $60.
the cart that checked out
By July 20 the plan had grown. Instead of small boards hidden near each AC, I wanted one elegant wall-mounted device with a color screen: temperature in big digits, CO2 next to it, buttons on the front. The cart, all from M5Stack's shop:
| Part | Price | Role |
|---|---|---|
| M5Stack Basic v2.7 | $39.90 | ESP32 controller with the color screen |
| LAN PoE base W5500 v1.2 | $48.50 | Ethernet plus power over the network cable |
Unit CO2L (SCD41) |
$45.90 | CO2, temperature, humidity |
| 2x Unit IR | $7.90 each | infrared emitters, one per AC |
| Grove cables and jumpers | $10.40 | wiring |
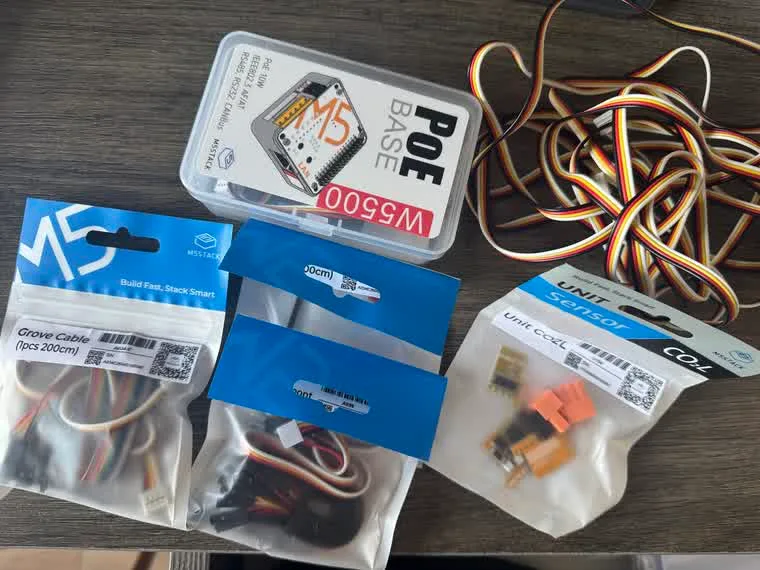
Total: $169.70 (including shipping). Claude confirmed the cart item by item. Its verdict: checks out, safe to order.
Every item on that list was correct. The cart was fine.
It just wasn't the plan.
what arrived, and what didn't fit
The boxes arrived August 13, and every part was individually fine. The catch showed up during assembly, and it was not a missing part. It was a budget problem of a different kind: one small ESP32 does not have enough free pins and communication channels to run everything at once.
Think of the board's pins as outlets on a power strip, except some devices refuse to share and some insist on a specific outlet. The Ethernet chip in the PoE base claims the SPI bus plus a handful of GPIO pins. The color screen needs that same SPI bus plus pins of its own. The CO2 sensor takes the I2C port. And each infrared unit wants its own direct GPIO line, because infrared needs exact microsecond timing that can't be routed through a shared connection.
Ethernet, screen, sensor, and two IR channels together simply do not fit on this board.
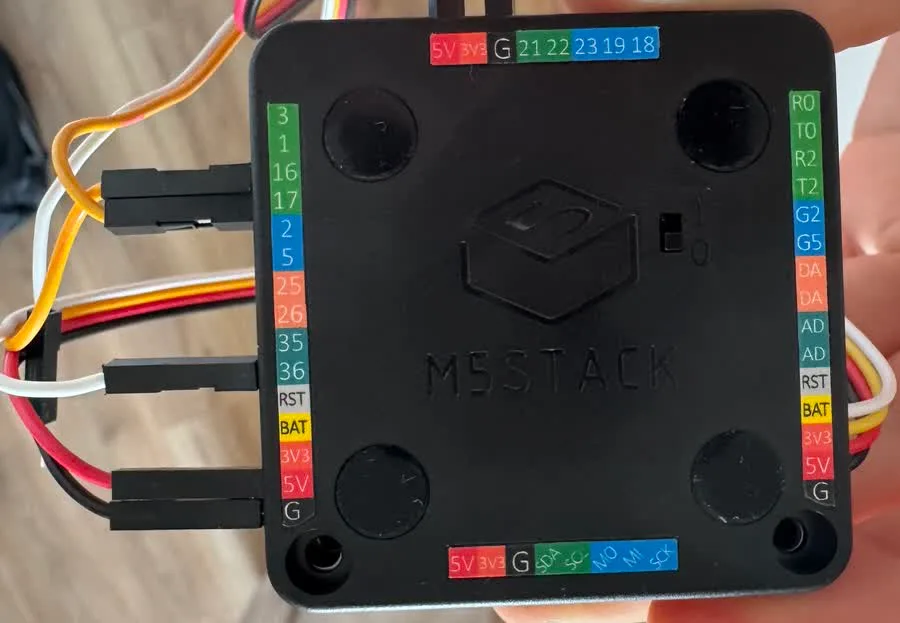
Something had to lose.
what got cut
Ethernet lost first. The $48 PoE base stayed in the build, but only as a power supply: the network cable delivers electricity and nothing else, and data moved to Wi-Fi permanently. There is a comment in the shipped config that says exactly that. I paid $48 for a power brick.
The IR receive channels lost second. The infrared units run transmit-only; I wired up a receiver when I needed to record the real remote's signals.
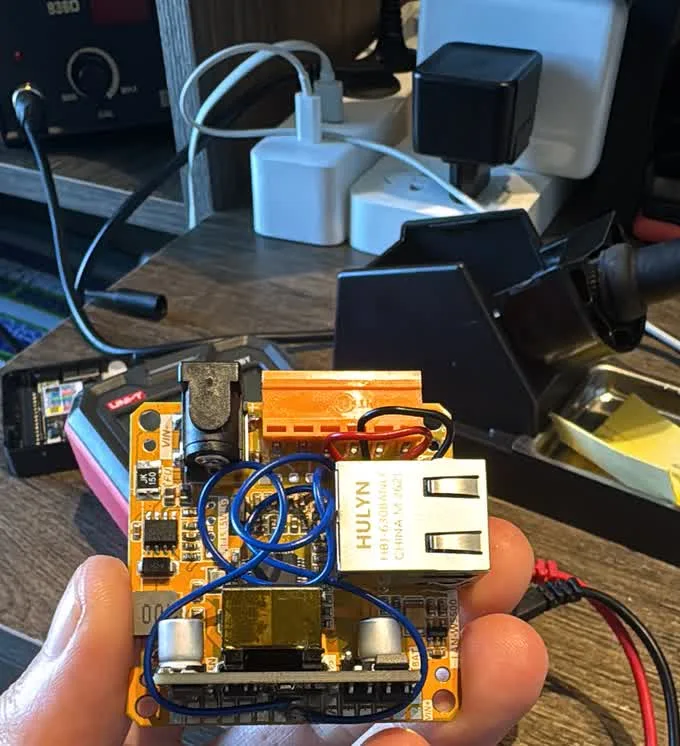
Then came the second catch. The screw terminals on the PoE base, the natural exit point for the IR wiring, are not connected to anything from the factory. Power, ground, and the control pins simply do not reach them. The usable pads exist only inside the stack. Claude and I walked through every no-solder alternative, and each one died. A hub is the wrong kind of connection: IR needs a direct GPIO with a 38 kHz carrier and microsecond timing, and every hub in this ecosystem is an I2C device that physically cannot do that. A $6 pass-through module needs soldering to attach anyway. Claude's summary: the six terminals are a blank to be soldered, not a ready breakout.
I had specified this build as no-soldering. Every path led back to a soldering iron. This is the point where I swore at my AI assistant, and its answer boiled down to: the parts are all fine, the sentence missing at order time was that wiring the IR units out of this stack means fifteen minutes with an iron.
It was right, which did not help.
four wires
So I bought a soldering iron, the first one I have ever owned, and practiced on a dead board.
The actual job was four jumper wires from the base's internal pads to the screw terminals: ground, 5V, and the two IR signal lines, G16 and G17.
It worked.
Four wires. That was the entire distance between one elegant device with a screen and a stack of parts that talk past each other.
an air conditioner that spoke no known language
Now the software half. The ACs are branded "Wagner," a regional white-label name, remote model G4W-18BHR. The obvious theory is that a no-name split is one of the usual suspects inside: Gree, Midea, the Coolix protocol family. ESPHome's IR climate support covers all of them out of the box. You capture one button press, the library names the protocol, and you're done.
I got an early false victory. The first remote I captured, to test the receiver wiring, was my home AC's remote. It decoded instantly as Coolix. For a while the plan was: it's Coolix, config done.
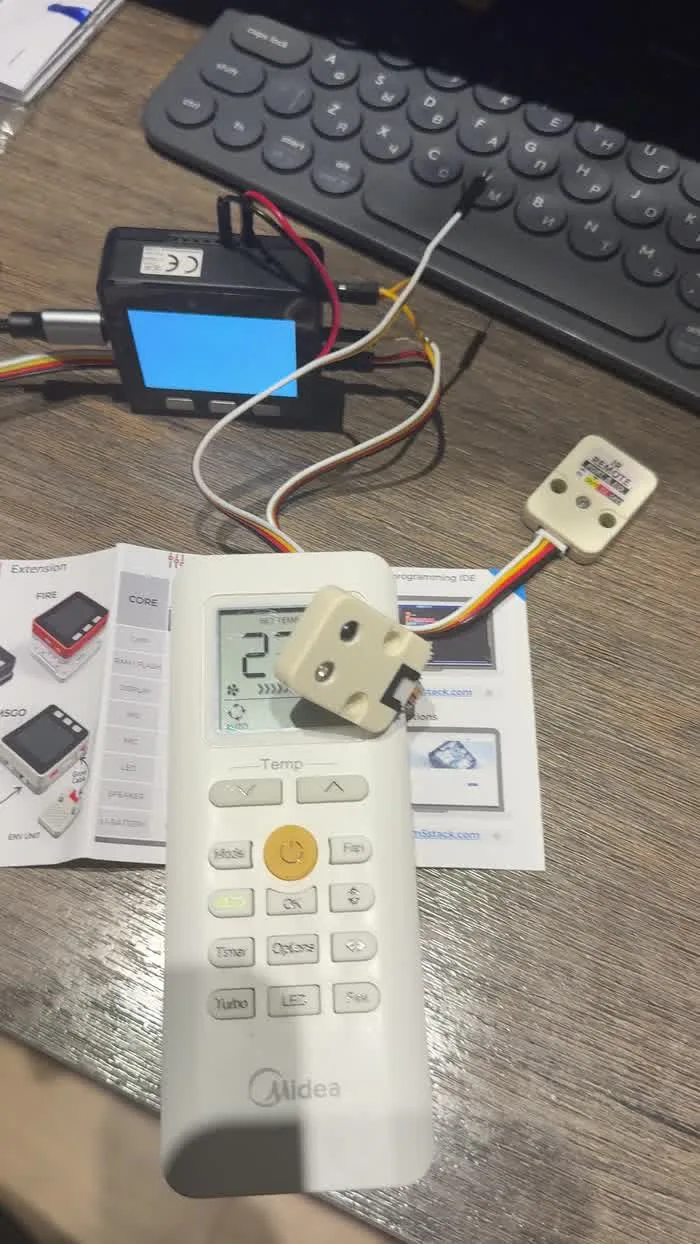
The actual remote was not the same remote.
The Wagner remote matched none of the roughly ten ready-made protocol decoders I tried. Gree in all its variants, Coolix, Midea, TCL112, everything. Nothing recognized it. Somewhere a factory had shipped an air conditioner speaking an infrared dialect none of the usual open-source decoders recognized.
reverse-engineering the ir protocol from 97 recordings
So we decoded it from scratch: me pressing buttons, Claude staring at the timings. I captured 97 infrared frames, and on September 1 the pattern gave in.
The result, now documented in the project repo: a 38 kHz carrier, which is the specific flicker rate the AC's receiver eye is tuned to. A 96-bit frame, 12 bytes, sent least-significant-bit first. A 6180 microsecond header pulse announcing each message. Temperature encoded as the value minus 16 in byte 9, so 24°C travels as an 8. Fan speeds numbered backward, 1 for max and 3 for min, because of course they are. And a checksum, the frame's built-in way of noticing corruption, that is nothing fancier than the sum of the first 11 bytes modulo 256.
No existing ESPHome component spoke it, so we wrote one: a custom decoder and encoder, built largely with Claude doing the byte arithmetic and me doing the button pressing.
proving it
A decoded protocol is a theory until it round-trips. We re-encoded every captured frame from the formula and compared the output byte for byte against the recordings. The first run scored 44 of 45; the single mismatch was a transitional frame caught mid-mode-switch. The control run scored 52 of 52.
Then the loop closed itself in the most satisfying way available. On the first live transmission, the device's own receiver caught the frame its own transmitter had just sent, and decoded it correctly. The bytes matched a recording of the real remote for the same state exactly.
On September 4 the real indoor unit obeyed: on, off, factory turbo.
The protocol was closed.
the bug that wasn't
One debugging story worth its space. The IR LED on the emitter module is fed through a 150 ohm resistor, about 23 mA, against the hundreds of milliamps a real remote pushes. Range is roughly two meters and the beam is narrow.
One day the AC stopped responding. I burned hours on a plausible hypothesis: maybe a single frame wasn't enough and the command needed repeating, the way some remotes hammer their message several times. Four-copy frames worked once, by coincidence, then failed too. The actual cause, the entire time, was that the LED was pointed slightly off axis. Aimed properly, a single frame was enough, exactly like the factory remote.
With a weak emitter, aim matters more than distance. The AC was never ignoring me. I was talking past it.
controlling a split system remotely, without the remote
Here is the finished behavior, running on the wall with nobody in the building, no server and no phone app required to keep it running.

The room sensor is the thermostat, not the AC's own one, and it updates every 60 seconds. In summer, cooling switches on at 24.0°C and off at 23.0°C. In winter, heating switches on at 18.0°C and off at 22.0°C.
The trick that makes a cheap split behave is the setpoint. The box deliberately commands the AC to an overshoot target, 18°C when cooling and 24°C when heating, so the AC's own thermostat never decides it's done and starts dawdling. The box itself cuts the unit off when the room sensor says done. The AC works at full tilt or not at all, and the room, not the machine, is the judge.
Every 15 minutes the box re-sends its current command. Anyone who fixes the climate with a physical remote gets quietly overruled within a quarter of an hour. The remotes still work; they just don't win.
The night schedule is the money part. Both units switch off from 23:00 to 08:30, every day, because night bookings are rare and an empty room does not need conditioning. A frost guard heats if the room falls to 10°C and stops at 13°C. The rare night visitor presses a button on the box to suspend the schedule.
Three buttons total: cycle auto/manual/off, toggle the night schedule, and a 180-minute boost at the coldest setpoint and max fan. The screen shows temperature in half-screen digits and CO2 color-coded: green below 1000 ppm, yellow to 1500, red above. Red means open a window, which in a room full of people under shoot lights happens well before anyone feels warm.
And a failsafe: if the temperature sensor drops out, the box switches both ACs off rather than run blind. Turbo and off are the only commands it will still send without sensor data. There is no server, no cloud, no app. If Wi-Fi dies, the logic keeps running on the device.
turning the ac off at night: what it saves
I did not install an electricity meter, so what follows is arithmetic on stated assumptions, not a measurement. The assumptions are in the open; disagree with any of them and the number moves.
The remote's model number marks these as 18,000 BTU-class splits, which draw roughly 1.5 to 1.8 kW while the compressor runs. Left on overnight, a split's compressor cycles; call it running about half the time. The schedule removes 9.5 hours a night, on two units.
Two units, 9.5 hours, about 1.65 kW, half duty: roughly 15 kWh per night, with a fair range of 12 to 19. Per month, roughly 450 kWh, range about 350 to 570.
Pricing is illustrative arithmetic only: at $0.10 per kWh that is about $45 a month, so the $166.40 of hardware pays for itself in around four months on the night schedule alone, before counting whatever the daytime hysteresis saves. Your tariff will differ. The shape of the number will not: the biggest feature in this build, the one that actually saves electricity, is the off switch.
the same build, cheaper: no screen, no PoE
Now the honest postscript. Knowing everything above, here is what I would actually build.
The roughly $50 version, no soldering. Two M5Stack Atom Lite boards, under $10 each, one stuck next to each AC. The IR LED is already on the board, so the entire soldering saga in this post evaporates. Add one CO2 sensor unit on the Grove port of one Atom (the SCD40 version was $33.90 when I checked in July; the SCD41 in my build costs more). Power both from any USB phone charger. Run the same ESPHome logic over Wi-Fi. No screen: the numbers live in ESPHome's built-in web page, readable on any phone. No PoE: the phone charger is the power supply. This is the version I should have started with.
The roughly $20 version, if you can solder a little. Any generic ESP32 dev board, $4 to $6. An IR LED plus a transistor and two resistors, under a dollar in parts, is the whole IR side. A basic temperature and humidity sensor, a few dollars, covers the thermostat. That gets you the hysteresis, the overshoot trick, and the night schedule: everything in this post except the CO2 number.
Where not to cheap out: the CO2 sensor. A real CO2 sensor, photoacoustic or NDIR like the SCD40 and SCD41, is the one part that costs real money, $30 and up, and it costs that for a reason. Cheaper boards advertise eCO2, which is an estimate derived from other gases, not a CO2 measurement. That warning surfaced in my July parts research and is why the SCD41 is in the box. If the room-full-of-people number matters to you, pay for it. If it doesn't, drop it, and the whole build gets very cheap.
What did the $169.70 actually buy over the $50 version? A screen on the wall, so the numbers are visible without a phone. Three physical buttons. And $48 of Ethernet that carries no data. The logic, the protocol work, and the savings are identical on the cheap builds.
I would build the $50 version today. The $169.70 version is what it cost me to learn that.
Because here is the thing the whole project turns on: not one expensive part ever failed. The board was fine, the base was fine, the sensor was fine, and Claude's cart really did check out, line by line. What nobody counted was the connections: the shared bus, the pin budget, the six terminals that were a blank.